


Perhaps you might have a small yard, or a tiny patio backyard that you simply lovingly have a tendency.
Or possibly your backyard is already chock-full of inexperienced goodness and also you don’t have any area for any big, hungry melons.
Regardless of the cause, when you suppose you don’t have the area to develop your individual candy cantaloupe, suppose once more.

We hyperlink to distributors that can assist you discover related merchandise. Should you purchase from one in all our hyperlinks, we could earn a fee.
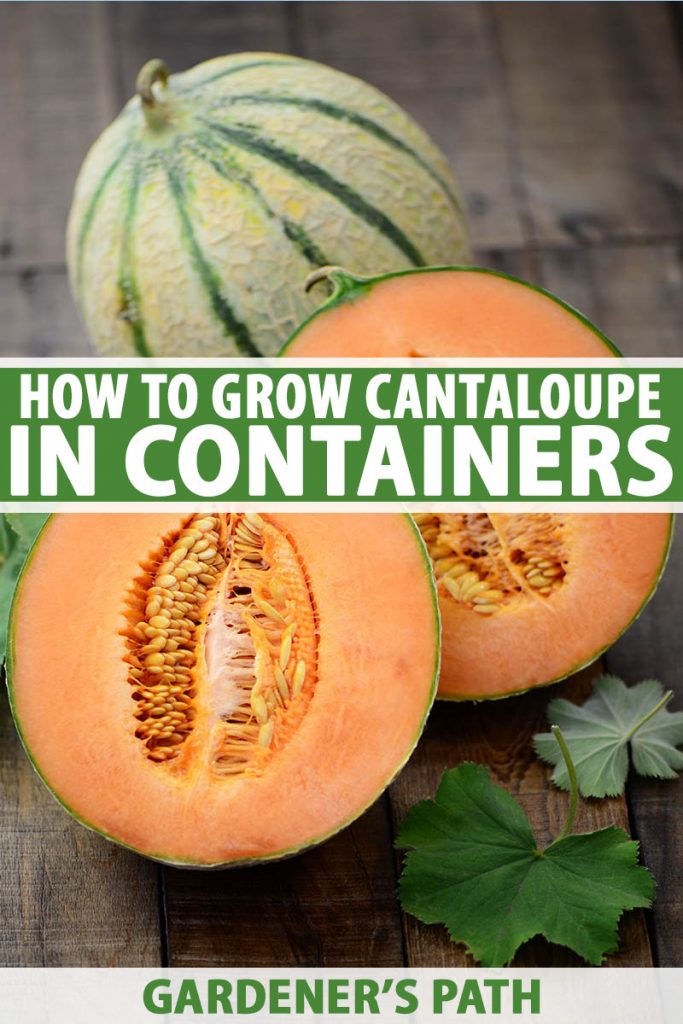
With the suitable care, cantaloupe can thrive in a container – even a smallish one – which implies anybody, wherever, in no matter measurement home or backyard, can take pleasure in its candy deliciousness.
On this information, I’ll present you precisely how. Right here’s what I’ll cowl:
Getting Began
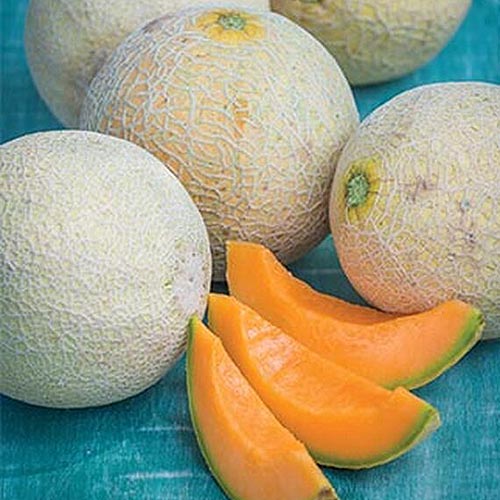
Like pumpkins, watermelon, and cucumbers, the cantaloupe is a member of the Cucurbitaceae household.
Originating in south Asia, cultivated in Europe, and bought commercially in the USA since 1890, there are two main varieties we take pleasure in at this time: the North American Cucumis melo var. reticulatus, and the European C. melo var. cantalupensis.
To search out out extra about this best-ever melon (for my part!), take a look at our cantaloupe rising information.
This text will deal with making your container-grown cantaloupe desires come true.
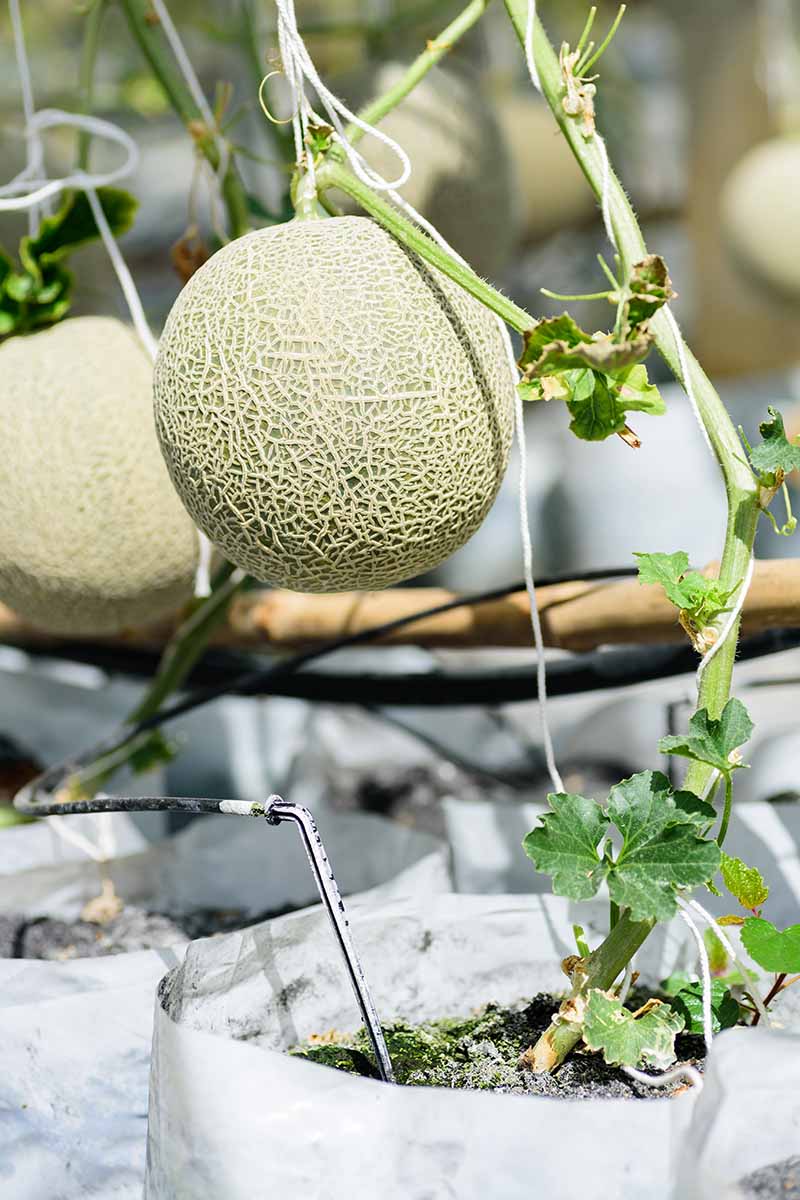
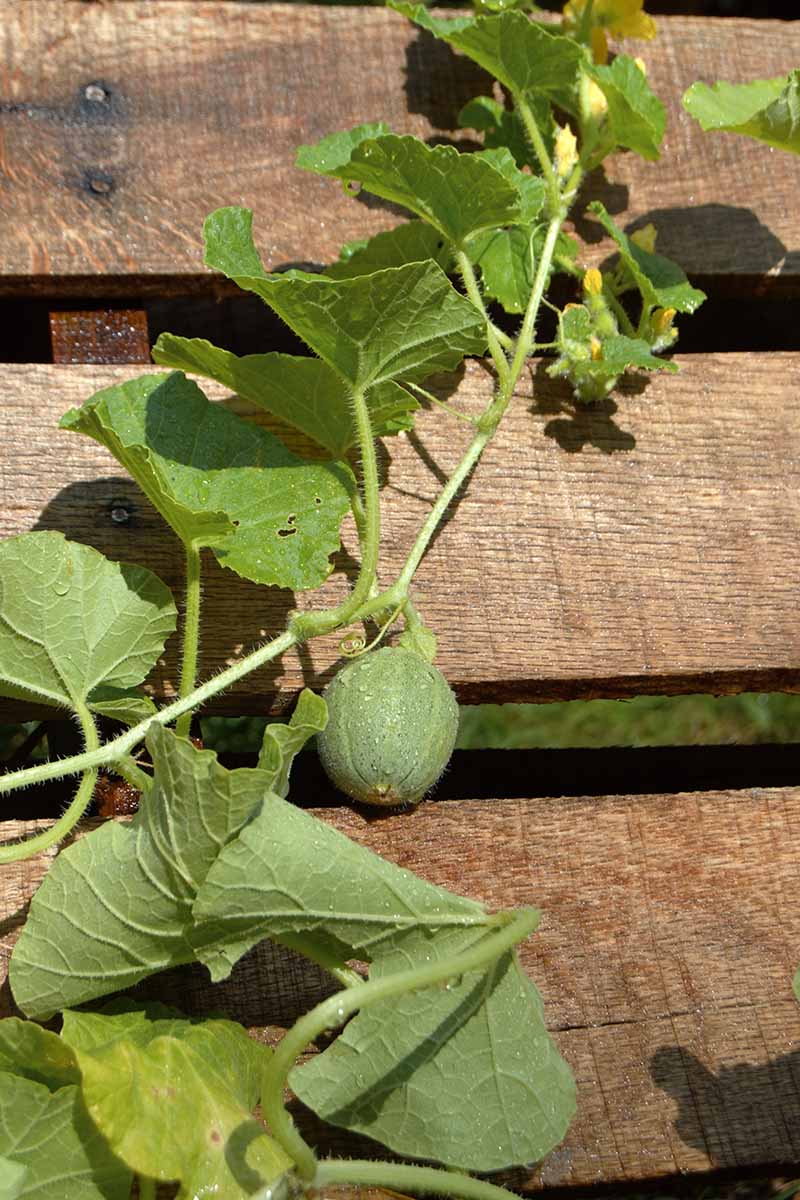
To start out, these are vining crops, with a sprawling development behavior.
For a container backyard, you’ll want to pick out a dwarf selection – I’ve offered a few suggestions beneath – and also you’ll additionally want to coach them to develop vertically, utilizing a trellis, or a tomato cage.
Able to develop? Let’s go!
Why Develop in a Container?
Apart from lack of area, what different causes would possibly there be for rising your cantaloupe in a container? One outstanding cause I can consider is that this: the climate.
Melons adore the warmth.

They develop finest when daytime temperatures hover between 70 and 90°F, with nighttime temperatures dipping no decrease than 50°F.
Should you’re like me and you reside in Alaska, or in another chilly zone, that your means to take care of these temperatures is probably going unreliable.
Particularly not for the entire of the 65 to 90-day rising interval cantaloupes want, relying on the cultivar.
That’s why containers are the right match for cold-zone growers who need garden-fresh melons: develop your cantaloupe indoors, or in a greenhouse for so long as it is advisable.
Or you possibly can set them exterior throughout the day and produce them indoors at night time.

The identical goes for these of you in extra-hot areas. Melons love warmth, however they don’t need to be inundated by it.
So if temperatures commonly rise above 100°F in your space, containers help you transfer your cantaloupes out of the warmth when wanted.
The pliability a container provides is essential to your success.
With a container, you possibly can develop cantaloupe as an annual in any zone, at nearly any time of the yr. Speak about an prolonged rising season!
Proper now in my space (Zone 4), nights dip right down to the low 40s and daytime temperatures wrestle to achieve 60°F.
And June is simply a few weeks away. My younger cantaloupe crops are safely ensconced indoors, the place they don’t have to fret about freezing to dying.

To maximise my possibilities of pulling in a profitable harvest, I’ve determined to maintain two of my 5 melon seedlings indoors, and I’ll plant the opposite three out in pots on my patio come July.
I’ll present you the way I’m doing it so you possibly can strive it too.
Selecting the Proper Container
These vining crops want loads of area for his or her roots to develop, so select a container that’s no less than 16 inches deep and 14 inches large.

24 inch Spherical Traditional Planter
When you’ve got the area, you may strive these giant plastic planters, accessible from Amazon, if you wish to develop full-size varieties.
Indoor or patio-garden growers might want one thing smaller and simpler to maneuver round. The pot you select may be constructed from sturdy plastic, terra cotta, or breathable cloth.

So long as it offers good drainage with holes on the backside, or a self-watering planter insert, you’re able to get began.
And you may at all times add pebbles to the underside of the container for drainage if wanted – and when you’re not planning to maneuver it round.
After I obtained began with the duty of transplanting my younger crops from seed trays into containers, I spotted that not one of the pots I had readily available have been really large enough.

Because the crops are nonetheless smallish, I made a decision to transplant them anyway. I’ll transfer them into their bigger, everlasting containers in a number of weeks.
You are able to do the identical when you’re nonetheless making an attempt to find the perfect planter on your younger melons.
Making ready Your Container
Earlier than you get rising, discover a full solar location the place your container will obtain 6-8 hours of sunshine per day.
This could both be a sunny space of your own home, underneath synthetic gentle, or open air.
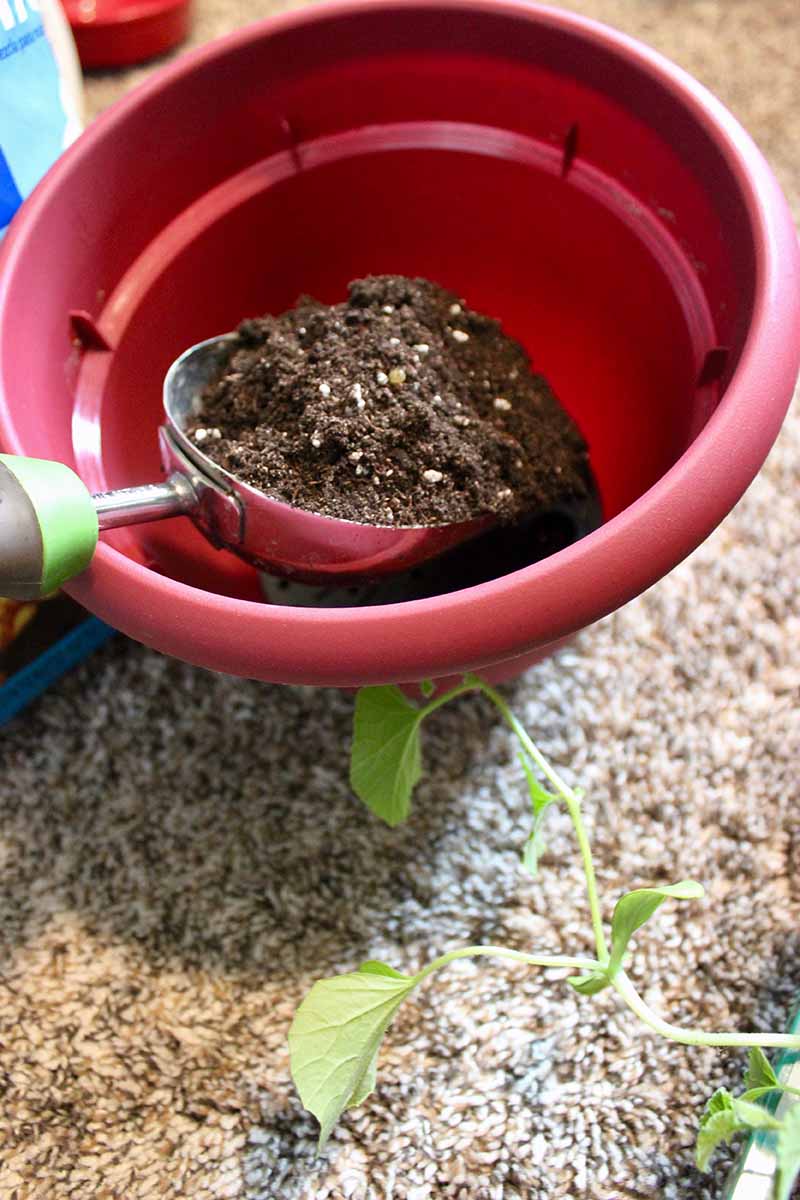
Fill your container to an inch beneath the highest with both:
- Good high quality, well-draining potting combine (don’t add fertilizer but)
- Properly-draining backyard soil amended with compost or well-rotted manure.
Should you resolve to make use of soil out of your backyard, don’t use soil that has been beforehand planted with cucurbits, as it may harbor illness.
Cantaloupes desire soil with a mildly acidic pH of 6.0-6.5, that’s unfastened and well-draining to encourage the expansion of wholesome roots.
Find out how to Develop
You’ll be able to both direct sow seeds in your container or begin them in seed trays. Should you stay in a chilly space, it’s finest to sow seeds indoors no less than 4 weeks earlier than your common final frost date.
For these in hotter areas, sow in containers open air anytime after your common final frost date, offered your rising season is lengthy sufficient to provide your chosen selection time to mature.
Since I stay in frigid Alaska, I began mine in seed trays a few months earlier than final frost. As a result of I planted them pointy-side-up, solely half the seeds germinated. Oops!
You need to plant them pointy-side-down, as that’s the place the roots emerge.

To sow seeds in containers, dig a half-inch-deep gap and drop two seeds inside, pointy-side-down. Do the identical factor in seed cells. Cowl with soil, and water with a sprig bottle so that you don’t displace the seeds.
To encourage them to germinate shortly, you possibly can cowl the pot or seed tray with plastic to lure humidity inside.
Simply make certain to take away the protecting the second the primary inexperienced shoot pokes by the soil. Hold them evenly moist, in a sunny spot or underneath a develop gentle.
Skinny seedlings to at least one per container or seed cell once they have their first set of true leaves.
When to Transplant
Should you begin your seeds in trays (or have bought seedlings from the nursery), you’ll must transplant them to their everlasting container once they have no less than two units of true leaves.
I left mine of their trays for 2 months, and one of many crops began getting droopy and sad.
I’m fairly certain it felt cramped, and didn’t have sufficient root area.

In case you are transplanting your seedlings to an out of doors container, be sure you harden them off first.
To do that, place them exterior in a sunny location for a number of hours per day, progressively rising the period of time over the course of every week.
To transplant, all you must do is dig a gap the scale of the foundation ball, gently take away the seedling from the tray, and set every one in its new container. To make this simpler, water the seedlings about half an hour earlier than transplanting.
Backfill the opening, give the seedling a sluggish, deep watering, and add half an inch of additional soil on prime for help.
Then, place the containers close to a sunny windowsill, underneath a develop gentle, or in your chosen location open air.
Container Care
When the plant is about 4 to 6 inches tall, fertilize with a balanced liquid fertilizer equivalent to 5-5-5 (NPK) in line with package deal directions.

Fertilize once more in about two or three weeks, or when flowers begin to develop. However this time, use a decrease nitrogen fertilizer, equivalent to 5-10-10 (NPK), so that you don’t promote an excessive amount of leafy development and never sufficient fruit growth.
One other essential side of conserving cantaloupes blissful is to supply satisfactory water. These crops want constant moisture, however don’t permit them to turn into waterlogged.
That is particularly essential while you’re rising them in containers, which dry out extra shortly than backyard soil. To assist preserve the soil moist, you possibly can apply a layer of straw or different mulching materials.
Hold the foliage dry by irrigating on the base of the plant, not from overhead.
Within the final week earlier than harvest, water solely when the highest two inches of soil is dry and the leaves are barely wilted. This permits the sugars to pay attention within the melons and prevents them from cracking.
Coaching the Vines on a Trellis
Keep in mind how I stated to not fear about managing unruly vines in a 16-inch container? Right here’s why: it’s straightforward to coach them to develop vertically on a trellis or related help construction.

Bamboo 4 ft U-Hoops, Pack of 10
Straightforward helps for container-grown cantaloupes are bamboo u-hoops, like these bought on Amazon.
You may as well use tomato cages, or prepare them up a trellis in opposition to a wall in your backyard.
To connect the plant, take some backyard tape and wrap it across the vine, and tie it to the ring or trellis. Add extra tape to connect new development to the construction because the vines get longer.
When the melons have grown to concerning the measurement of a fist, you should utilize ankle-length nylons or netted produce baggage to sling the fruit to the construction, to provide the vine additional help.
Merely place the produce bag across the growing fruit, and connect it to the trellis or different help. Because the fruit grows, the bag will increase and stop the vine from breaking.
Learn extra about rising cantaloupe on a trellis.
Rising Ideas
- Select a container that’s no less than 16 inches deep and 14 inches large
- Preserve even moisture till the final week earlier than harvest, then cut back watering to solely when dry
- Prepare vines to develop vertically on a trellis to save lots of much more area
Cultivars to Choose
Whilst you can develop full-size melons in containers, you’ll get the most effective outcomes with dwarf cultivars that produce smaller fruits and shorter vines.
Listed here are a few my favorites:
Sugar Dice
True to its title, ‘Sugar Dice’ delivers candy taste. It’s immune to many frequent illnesses, together with fusarium wilt.
This hybrid cultivar produces small fruits of simply 2-4 kilos in weight, so it’s preferrred for container rising.
‘Sugar Dice’
Like different melons, ‘Sugar Dice’ wants full solar, and fruits can be prepared to reap in 80 days.
Discover packets of 30 seeds accessible at Burpee.
Tuscanito
This “child” melon reaches about 2 kilos in weight, with a agency flesh and candy taste.
You’ll be able to even retailer these infants within the fridge for as much as two weeks earlier than reducing, they usually’ll keep contemporary.
Hailing from Italy, ‘Tuscanito’ is a well-liked hybrid to wrap in prosciutto for a tasty snack.
‘Tuscanito’
With loads of sunshine, you possibly can njoy your ‘Tuscanito’ fruit in simply 70 days.
You will discover seeds in quite a lot of packet sizes at True Leaf Market.
Managing Pests and Illness
Cantaloupe can fall prey to break from aphids, cucumber beetles, cutworms, and squash bugs.
However since you’re rising it in containers, you possibly can preserve a more in-depth eye on the crops and nip any infestations within the bud.
To handle aphids, spray the vines and leaves with a robust blast of water after which apply diatomaceous earth – which might additionally assist handle squash bug infestations.
Within the case of unhealthy infestations you should utilize neem oil or insecticidal cleaning soap, which might additionally assist do away with cutworms and cucumber beetles.

Alternaria leaf blight impacts crops in sizzling, humid situations, and it’s brought on by the fungus Alternaria cucumerina.
The illness begins as small brownish-yellow spots that develop greater and unfold to different foliage.
Take away affected leaves and spray with fungicide. To keep away from this situation, carry your crops indoors throughout highly regarded and wet climate.
Downy mildew is a typical however annoying illness that causes brown spots on the leaves and ultimately kills them.
It’s brought on by Pseudoperonospora cubensis, and is finest handled with fungicide. To keep away from it within the first place, preserve the plant out of overly humid situations and abstain from overhead watering.
Harvest Time
To reap your container-grown cantaloupe, watch the netting and the rind beneath.

When the rind turns from inexperienced to yellow and the netting from white to creamy-gold, it’s harvest time.
The stem needs to be beginning to separate from the melon, and all it takes is a mild tug to take away it.
The cantaloupe also needs to odor candy and juicy, particularly within the spot the place the vine meets the fruit.
If you’d like an extended shelf life on your melons, harvest them when there’s only a slight melancholy on the stem, not a full crack.

The flavour is probably not fairly as candy, however you’ll have the ability to preserve it within the fridge for as much as two weeks.
In any other case, wash that melon and slice it up contemporary, or retailer it within the fridge for as much as 3-5 days.
Study extra about harvesting and preserving cantaloupes.
Melony Delights in Small Areas
Now that you know the way to develop cantaloupes in containers, there’s no cause you possibly can’t take pleasure in garden-fresh melons, regardless of how small your rising area.
Invite your pals over and wow them with a cantaloupe and prosciutto snack. Watch their eyebrows rise once they understand you grew the fruit in your patio.

Or, like me, merely take pleasure in conserving your melons protected against the climate by planting them within the protected flexibility of a container.
Have you ever ever grown melons in containers? Did you succeed, or fail? Tell us within the feedback beneath!
And if you wish to increase your container backyard, take a look at these guides subsequent: